iOS & Google Photos: Getting Creative With Google Assistant
Start With Google Assistant & Create Custom Video Slideshows
Introduction to Google Assistant
Google periodically provides special holiday “Assistant” themes. For instance, around Father’s Day, the ability to create a brief slideshow Father’s Day Movie.
This “Assistant” asks you complete two steps:
- Choose the “Father”, and
- Choose the “Children”
It then goes through your pictures and creates a video of your pictures containing the chosen individuals. I found that the video was either 16 seconds or 32 seconds — it just depended. And it is set to music.

That, by itself, is amazing. But, with a little creativity (and not much effort), it can be so much more.
My Steps to Create A More Robust Video
- Generate multiple videos (to “stitch” together a little later),
- Download the created videos to the device (iPhone or iPad) Camera Roll,
- Edit the videos using the iMovie app on my iPad, and
- Export video from iMovie to my Camera Roll
Here’s each step explained:
Generate Multiple Videos
Simply request the Google Assistant to generate multiple videos. So, in my case, pick the same “Father” (that’s me), but different “Children”. This helps to minimize duplicates. Here’s what I did:
- My 2 children — only.
- My 2 children and my wife (picked as Children — doesn’t matter).
- My daughter and my wife.
- My son and my wife.
- My son only
- My daughter only
Scan the resulting videos and pick which ones I want to use — each video was 16 seconds.
Download the Videos to your iOS Device
- In Google Photos — “Save” the Video (into Google Photos)

- Once it is Saved, the description will change to “View”

- Now, download the video to your iPhone Camera Roll


- REPEAT this process until you have all of your generated videos saved to the iPhone Camera Roll.
Edit the Videos Using iMovie
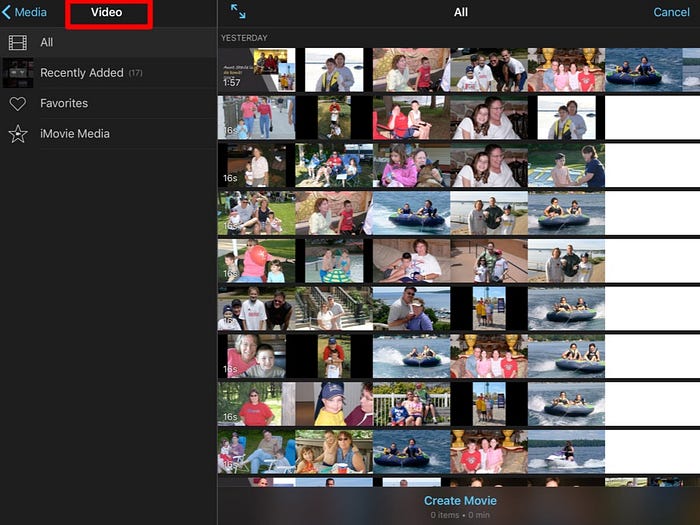
1 — Load the Video Clips Into iMovie
- Open the iMovie app (I will show this on my iPad, but the iPhone works the same way).
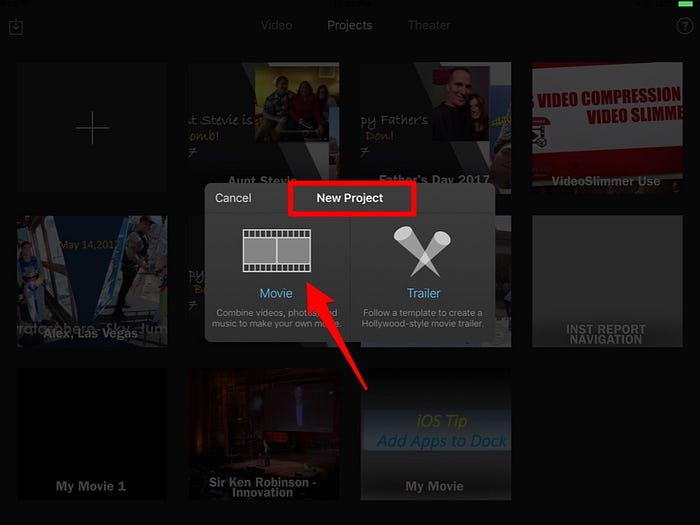
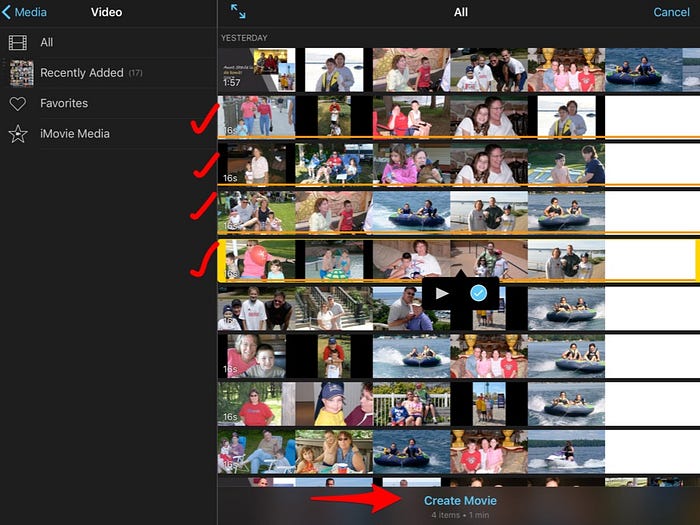
- Select the “Video” Media option and choose your videos to import into iMovie.

2 — Detach the Default Audio Included in Each Video Clip
- Once videos are loaded, it’s time to edit — very quickly! Detach the audio clip (it will be replaced shortly) and remove the “Google Photos” clip at the end of each video (we want these to flow seamlessly together!).

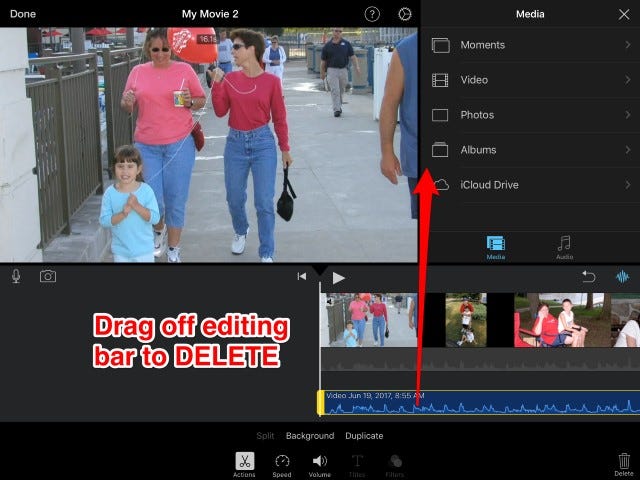

3 — Clip and Delete Google’s Default Trailer
- Next, we want to delete the default “trailer” that Google provides on each video it creates. This will enable the slideshow to flow seamlessly.


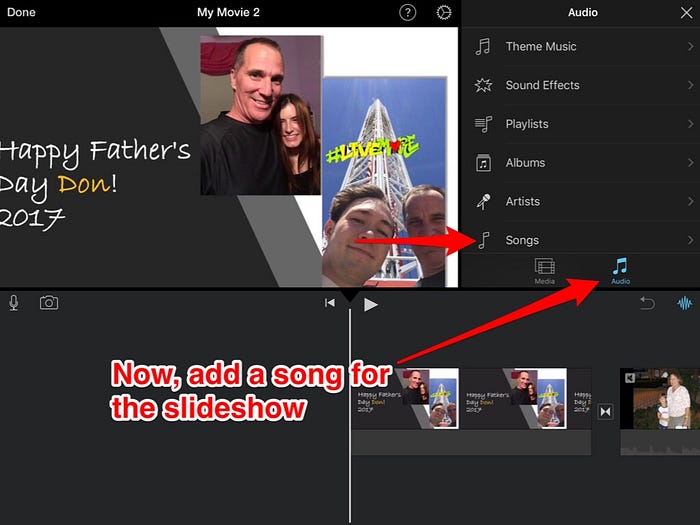
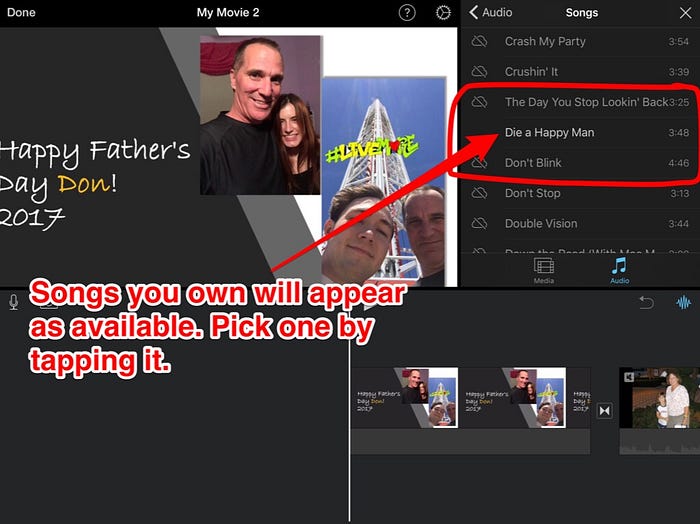
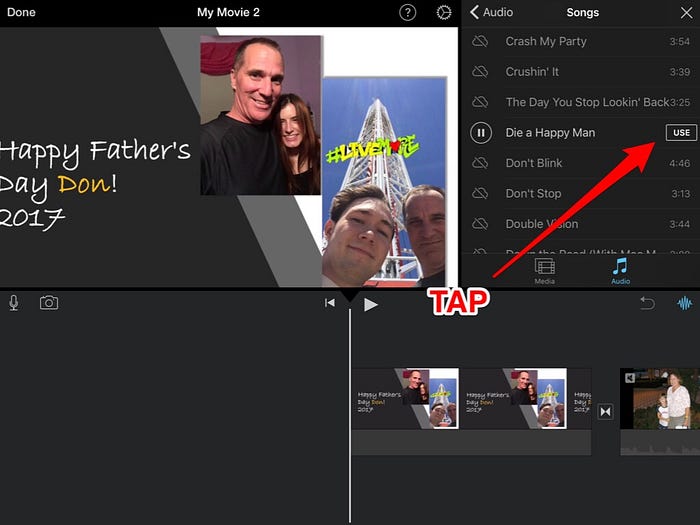
4 — Add Your Own Song to the the Slideshow
- You will likely want to add your own music, so we do that next.
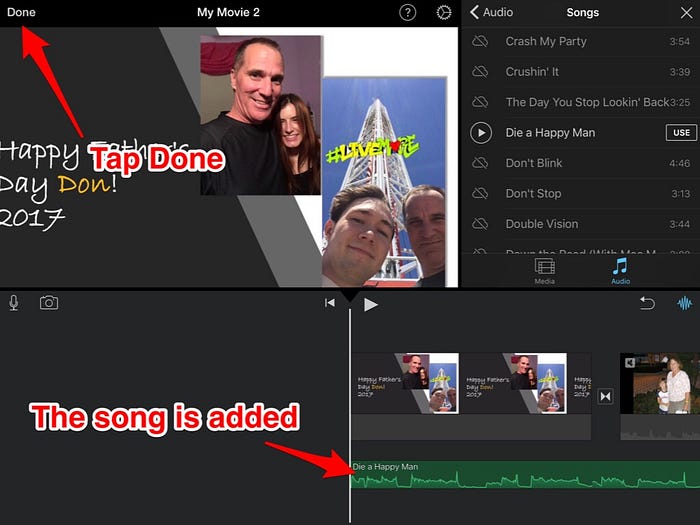
- Now you are done and we will export the video to your device Camera Roll
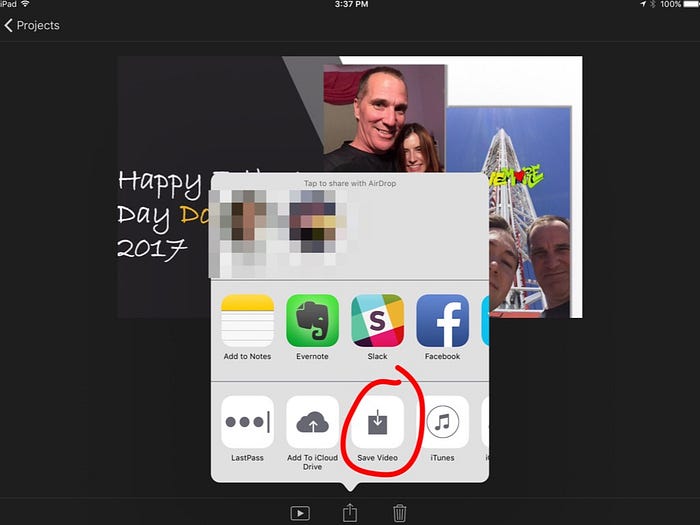
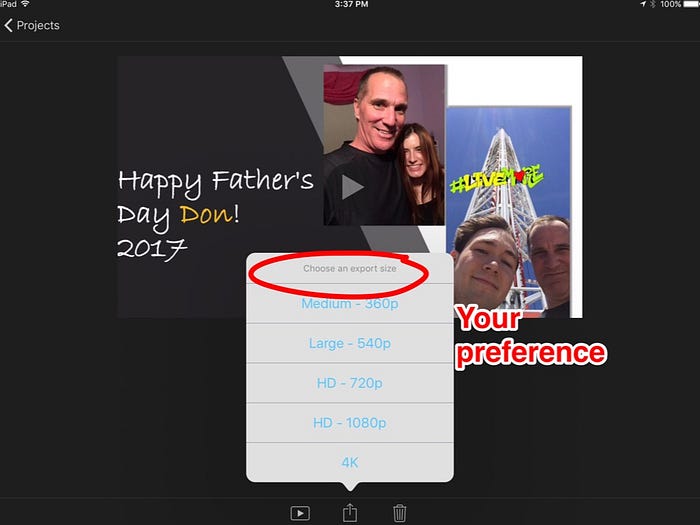
Export video to your Device Camera Roll
- Last item — save the video to your Camera Roll and you are ready to share!
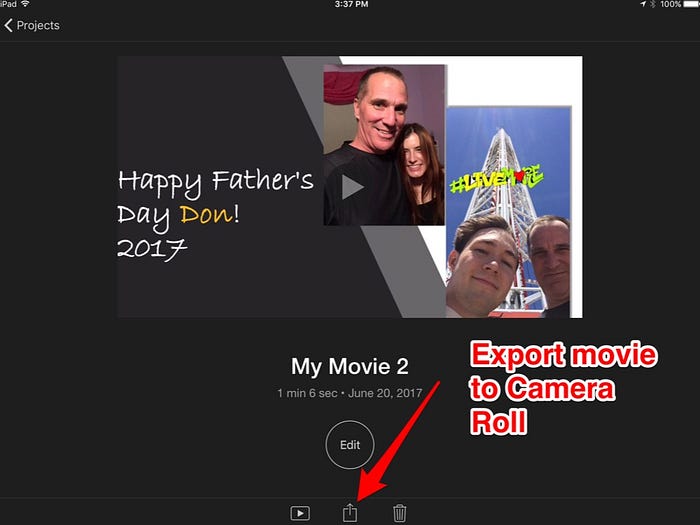
So, in a matter of minutes, I have taken a number of video clips and created ONE customized video that was about 1:20 in length. Very nice — and Google Photos / Google Assistant provides all the “clay” to work with!
About Don

“On a mission to challenge the status quo to a more productive and effective end…”
Don is passionate about helping professionals and organizations keep up and adapt to the changing business world that we operate in.
“What Do You Do?”
I frequently get this question. My response (it’s not what you think!)? Check it out here!
